by Denise Tyler (Deecey, ArtyMotion)
This tutorial is written for Poser 6, but the same principals will work in the Poser 5 Cloth Room. Additional, and more detailed cloth room tutorials, appear in the Poser 6 Tutorial Manual (choose Help > Poser Tutorial Manual to open the PDF file).
People often ask if you can pose a figure in the first frame of an animation and fit dynamic clothing to the figure. The answer is “Yes, you can” as long as you don’t need to calculate the additional cloth collision options available in the Simulation Settings dialog.
Unless you specify otherwise, you automatically work in frame 1 of a thirty-frame animation in any version of Poser, even if you are creating a still image. Poser defaults to these settings any time you create a new scene. As long as you do not move to another frame in the animation, everything you add to your scene appears in the first frame and stays in that position.
The following steps show you how you can pose a figure in the first frame and make dynamic clothing fit the pose, without having to calculate additional frames in an animation.
1. To begin, if you are using Poser 6, create a new scene and load standard or high-resolution Jessi into the scene. If you’re using Poser 5, load Judy into the first frame.
2. Open the Pose > Jessi Pose > Conversation > Intimate library, and apply the Intimate Talk 01 pose to Jessi. Judy has a similar pose if you are using Poser 5.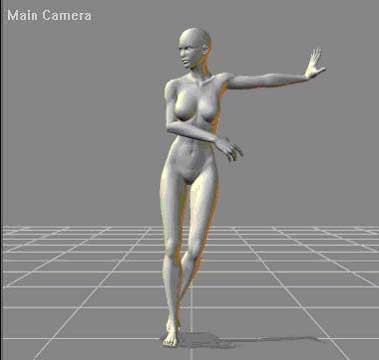
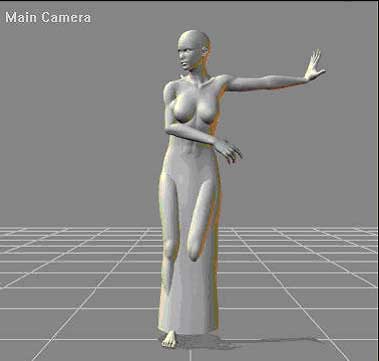
3. Open the Props library, and choose the Jessi Clothing subfolder. Add Dress Red (a dynamic dress) to the scene. Note that the dress does not automatically pose to the figure.
4 Dynamic clothing is different than conforming clothing. If you choose Figure > Conform To, and try to get it to conform to Jessi, nothing happens. That is because you have to create a cloth simulation to make dynamic clothing work. It’s not hard! First, click the Cloth tab to go to the Cloth Room.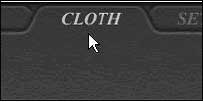
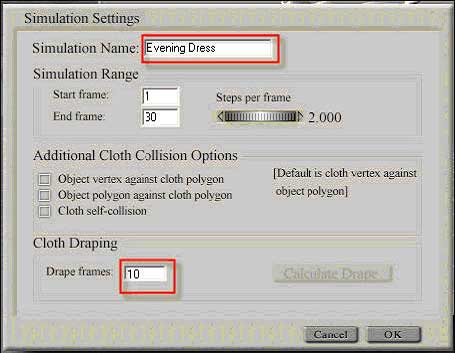
5. In section 1 of the cloth room, click the New Simulation button. The Simulation Settings dialog appears.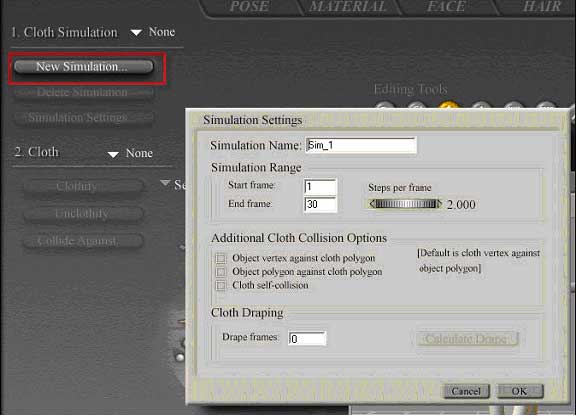
7. In Section 2 of the cloth room, click the Clothify button. The Clothify dialog appears. By default, the dynamic dress (DynamicDress2_1) should be selected, which is the item we need to clothify. (Clicking the down arrow allows you to choose any other item in your scene, but it is not necessary to do so for this tutorial). Click the Clothify button in the dialog box to clothify the dress (turn it into “cloth”). You then return to the cloth room.

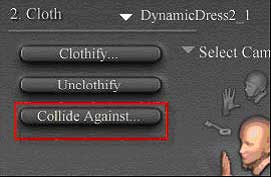
8. Now, additional buttons in section 2 should be enabled. If you do not select body parts for the dress to work against, the dress will fall to the floor during the simulation. To specify the objects, click the Collide Against button to select the body parts that the dress should work against.
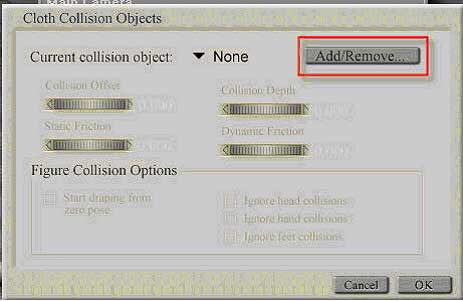
9.When the Cloth Collision Objects dialog appears, click the Add/Remove button to open the Hierarchy Selection dialog.
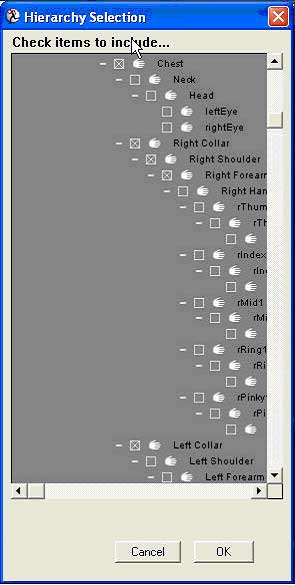
10.You can select all of Jessi’s body parts by clicking “Jessica”, however that creates a lot of unnecessary calculations that can increase the amount of time it takes to fit the dress. Initially, you should select the body parts on Jessi that the dress covers. You have to check the hip, abdomen, chest, right collar, left collar, right thigh, right shin, left thigh, and left shin to start with.
In addition to the parts that the dress covers, you also have to consider other parts that might touch the dress. Take a look at the pose, and observe that the right arm also touches the dress in this pose. So, you should add the right shoulder and right forearm to the collision list as well.
After you make your selections, click OK to return to the Cloth Collision objects dialog.
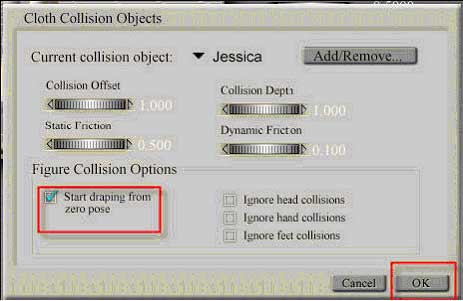
11. Now that the dress is clothified and the collision objects are set, there is one more thing that you should check to make sure that the dress moves to the pose in the first frame. Check the Start Draping From Zero Pose option at the bottom of the dialog. Then click OK to return to the cloth room
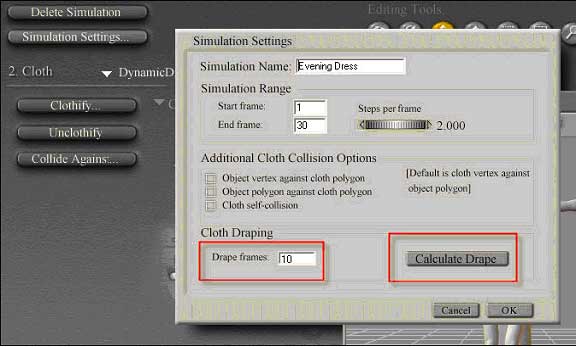
12. Ready for the magic? Go back to Section 1 of the cloth room. Click the Simulation Settings button again to open the Simulation Settings dialog. Then click the Calculate Drape button and wait until the calculations are complete. As each frame calculates, watch the magic happen. In ten frames (or the value set in the Drape Frames box), your dress should fit the posed character.
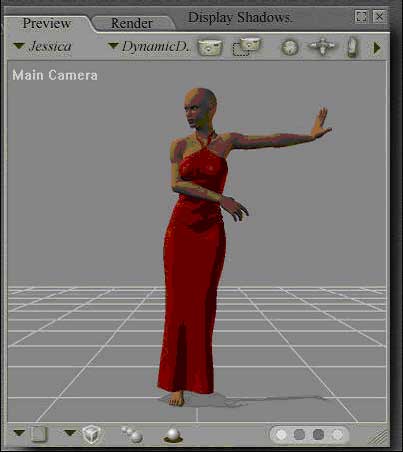
13.The final result, shown in Texture Shaded mode:
 Read More ...